A circular saw is often the tool we don’t associate with home crafting and DIY, but when we found that we had one from a toolkit purchase, we figured that we had better become familiar with it. We don’t need to find the best circular saw, but rather one that will do the job at hand. This tool is a power saw with a rapidly rotating toothed disk that cuts through varied materials. The power of the circular saw is dependent on the power of the motor.
In addition to choosing a different motor for power, you can also choose between cordless and corded models. The choice will likely be based on how you intend to use your circular saw, but we have found that most homeowners looking for assistance with general weekend type projects can get by with the cordless models which usually offer less power but more versatility. The most common of these saws is identified as the sidewinder saw, which means the motor is on the side. This is much different than a scroll saw were the blade runs vertical.
Safety First
First and foremost, do not use your circular saw for the first time without having someone on hand who is familiar with this tool. If this means taking it to your local hardware store, then do just that. The employees there are usually happy to help you, and are often able to make better sense of a manual and save you time trying to figure things out.
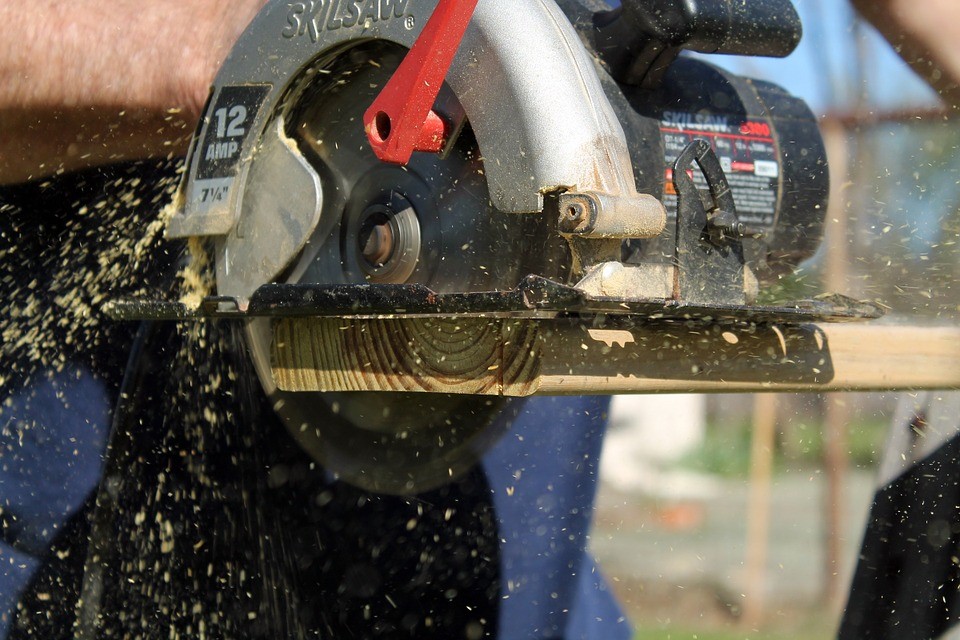
Our circular saw came with a rechargeable battery, so we didn’t have to worry about a power outlet being nearby, but we did start with a full charge. The more power, the more efficient and smooth of a cut you will get. Our Ryobi Cordless Circular Saw was designed with a handle, a trigger, and a blade with cover. Familiarize yourself with the parts of your own saw – without the battery on it, or the cord plugged in. Ours was already assembled, but you may find yourself having to assemble some of the basic components. Again, consulting someone who is familiar is an absolute must. Rogue saw blades come to mind if you don’t heed this advice.
Making Your First Cut
As you prepare to make your first cut, take a few safety precautions and secure any loose clothing, jewelry, and tie back long hair. You should wear safety goggles, and ear protection with ear plugs. Adjust the blade so that it only extends to ¼ of an inch below the wood or material that you will be cutting. After you have verified that your blade guard is in place, secure the piece that is being cut to the work surface so that it doesn’t fall off and cause injury or a skewed cut. Having both hands to guide the saw will create a nice clean cut as well.
Once you have taken these safety steps to ensure you are protected, and your item is secure, you are ready to cut. Start the saw by pressing on the trigger and then move it into the material that is to be cut. Do not start the saw when it’s already on the material.
Types of Cuts
There are two types of cuts that you can make with a circular saw, crosscuts and rip cuts. A crosscut goes across the grain of the wood, and a rip cut goes with the wood grain. A nice straight cut can be made by using a square-cut jig with your circular saw if you are attempting a crosscut.
A circular saw is not a table saw, but you can make it work for you to do a lot of the same cuts in both DIY and home crafting of bigger scale projects. But always remember, this is a strong blade, which can make for bigger injuries or mistakes if you are not well prepared before starting.